



Configuration
Before you can use Q-Matrix™, a few configuration steps are required.
Make sure you have the appropriate rights (e.g. administrator rights) to carry out the configuration steps!
Open the Start menu and look for the Start Menu folder you named under "All Programs".
In it you will find the shortcut to Q-Matrix™.
On startup, the correct configuration is checked. If this check - i.e. access to the database - is not successful, the configuration wizard starts.
A window appears in which you can specify on which Microsoft SQL Server the database for Q-Matrix™ should be created, or where it already exists.
The database will later contain and manage all the information you create.
The following steps are required:
1. Establish database connection
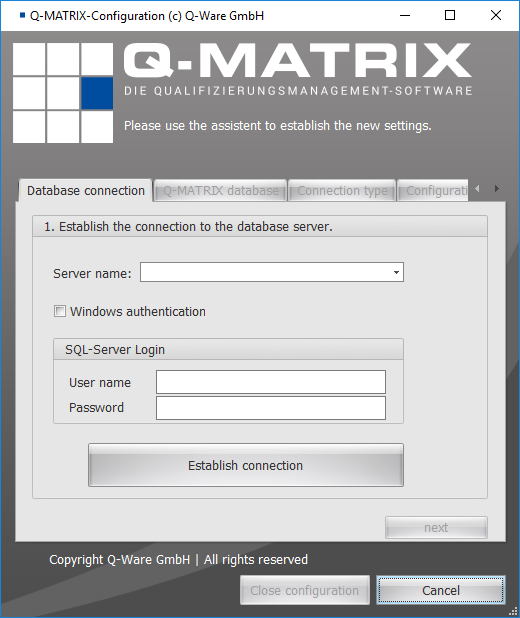
You can specify the type of authentication used to log in to the SQL Server.
Once you have entered all the details, click Establish connection to establish a database connection.
Click next to proceed to the next step.
2. Define database
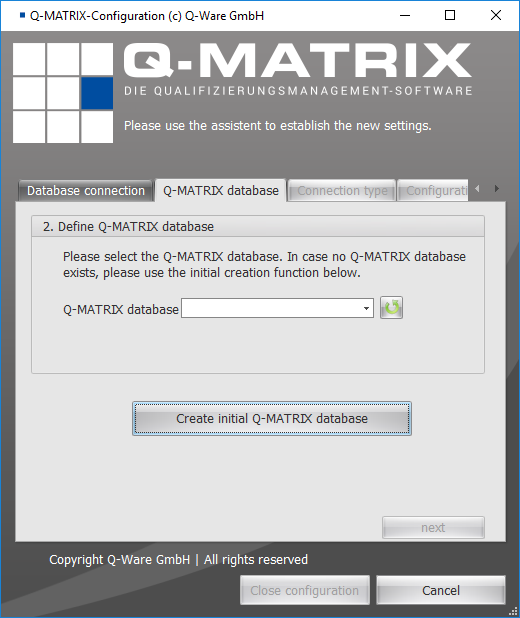
Select an existing database, or create a new empty database via Create initial Q-Matrix™ Database.
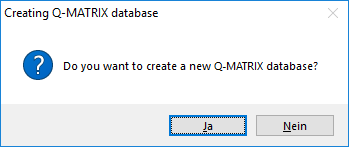
Confirm the dialog for a new empty database:
Then enter a meaningful name for the database (e.g. QM_Company).
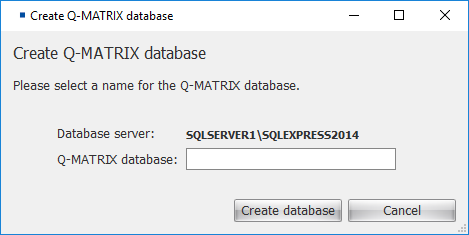
Select the newly created or existing database and click next to proceed to the next step.
3. Database access
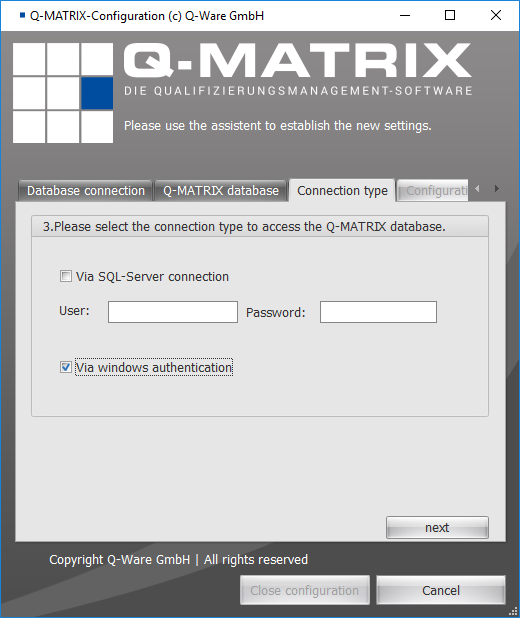
Database access can be established via a database user account (e.g. user "sa" with password "qm").
Please contact your IT department colleagues to obtain this information.
If you choose Windows authentication, the user's login credentials are passed through to the database.
For this user to be able to access the database, access must be configured in Microsoft SQL Server for that individual user, or preferably for a group of users.
For further details, see the dedicated SQL Server help, or ask your IT colleagues here on the internet.
Click next to proceed to the next step.
4. Save configuration
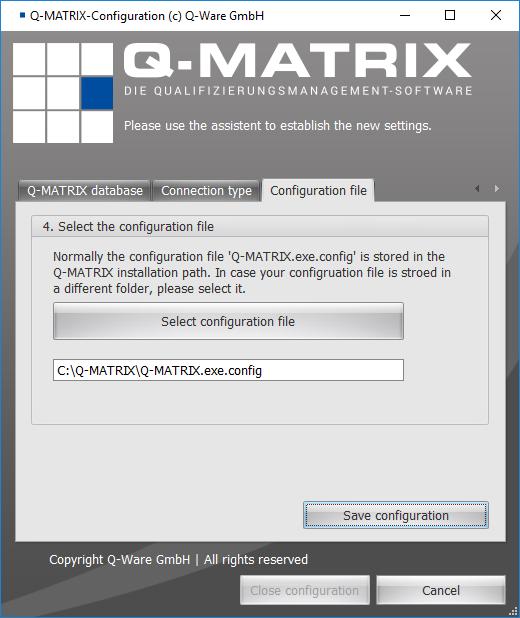
Accept the suggested value in the text field, or select the file via "Select configuration file".
Clicking the Save configuration button saves the configured settings.
The program then restarts and the login screen is displayed.